The ritual of rolling
Ask any cannabis or hemp smoker and most will agree that there’s something ritualistic about making a joint. From ready-ing your paper and crutch, through the grinding, rolling, and lighting of your finished masterpiece. Smoking a joint is perhaps one of the most enjoyable and certainly the most iconic ways to enjoy the cannabis or hemp plant.
Of course, you could get by on pre rolled joints, but learning how to roll a joint for yourself offers many benefits. In this article, I’m going to teach you, step by step, how to roll a perfect joint, well how to roll a good joint at least! You’ll probably need to practice before you can make it perfect.
How to roll a joint
The secret to rolling a great joint is in the grind, distribution, and roll. Make sure that your hemp is ground up well, then distribute your hemp evenly onto your paper, and then roll it back and forth in your fingers until it feels firm, but not solid, before tucking and sealing.
How to roll a joint in 5 easy steps (with photos)
Let’s run through that again but with some pictures shall we?
What you’ll need
- Between 0.25 and 0.75 grams of your favorite hemp flower
- Grinder
- Rolling papers (i suggest you start with shorter papers – 1 and 1/4 size)
- Piece of thin cardboard (to make crutch)
- Pokey (a device you can poke/pack the joint down with)
- Rolling tray (optional)
1. Grind up your hemp

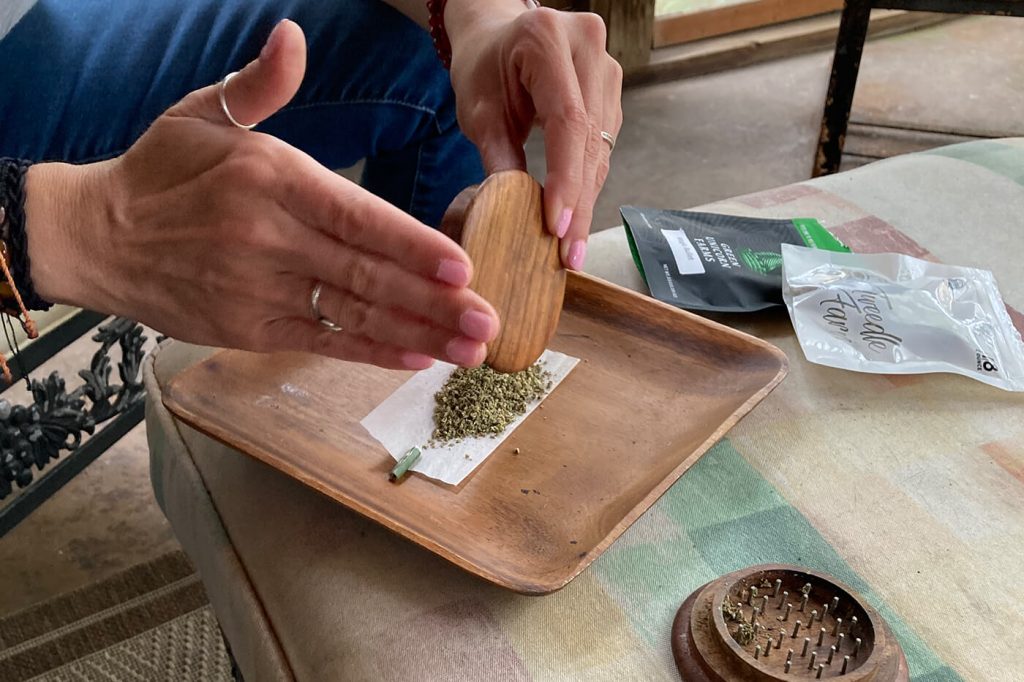
Take your grinder, add your CBD flower, and grind it up into small pieces. It’s much easier to roll a great joint if you load it with consistently, fine ground CBD flower, as it makes the rolling process much easier and also ensures a more even burn when you’re smoking it.
A grinder.will achieve the consistency you want much better than anything else, but if you don’t own a grinder, then you can use a pair of scissors or your fingers to cut/rip the CBD flower into small pieces.
2. Get your cardboard crutch ready

While you don’t actually need a crutch (see how to roll a joint without a filter below), they do make the joint easier to smoke when it starts to get shorter, because it gives you a bit more space to hold it.
For me, a crutch or a filter also makes the joint much more pleasurable to smoke as it helps prevents tar from getting on your lips, which (you’ll know if it’s happened to you) is pretty gross tasting.
The ideal thickness of the card you want to use for the crutch is exactly the same thickness of the card used to make most rolling paper packs. Other good sources of crutch material include old business cards, magazine covers, old birthday cards, and you can also buy books of crutch materials at head shops.
The length of the crutch doesn’t matter too much, but you will need the piece of cardboard to be wide enough to accommodate the crutch roll thickness )about one inch). I also highly recommend that, if needed, you use scissors to square off the end that will be going in your mouth, as this will help prevent tar build from building up there.
Start off by folding a very tiny “M” into the cardboard and then roll the card round and around until it’s the same thickness you want your joint to be at the mouth end.
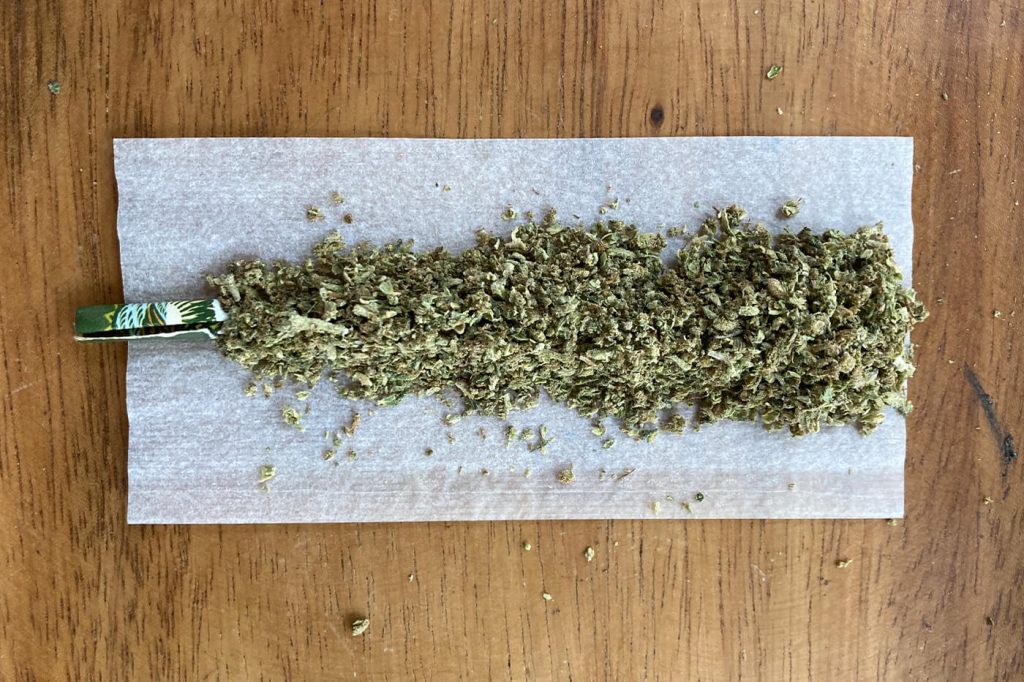
Keep it tightly rolled, place it into the rolling paper, and hold it in place inside the paper as shown.
3. Distribute your CBD flower onto your paper

Using your free hand, sprinkle your CBD flower into the paper, distributing it evenly (or in a cone shape like pictured). Before it’s been rolled, the hemp flower will be very fluffy, so you’ll want to add more than you think you need.
4. Roll back and forth until the hemp feels firm and even


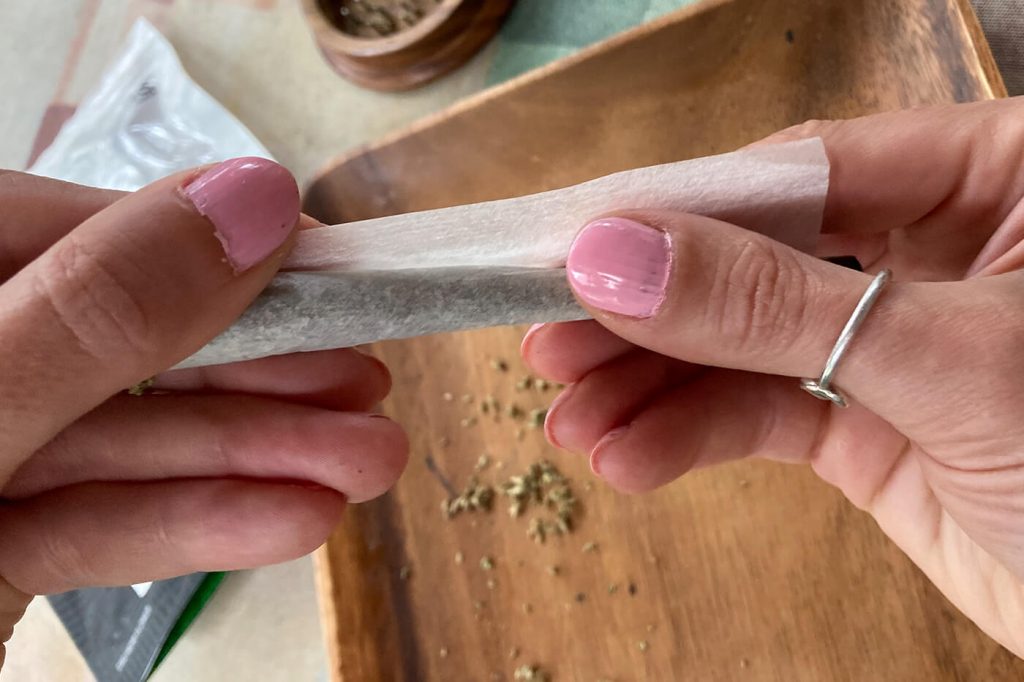
Keeping hold of the crutch end, place your free hand at the other end of the joint and slowly start to roll the joint back and forth between your fingers until the flower material is packed in more tightly.
The cardboard in the crutch end of the joint provides the most stability, so you want to try to take advantage of this by letting your roll radiate outwards from this (more solid) starting point. Do not take your hand off this cardboard filter as it will unroll and set you back a step.
Your non-crutch-holding hand can move around a little more and can make any adjustments you might need (like poking the flower up or down the joint to make it more even or putting the flower back in after it falls out).
5. Tuck, lick, and stick

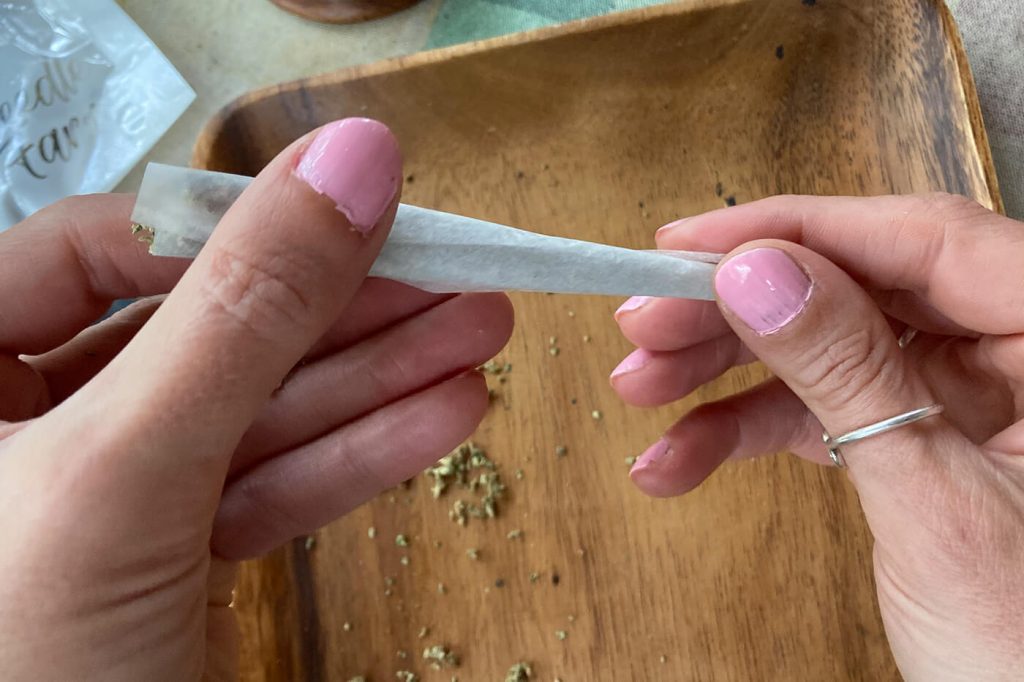
Ok, now for the tricky part. Most newbie joint rollers find it really difficult to get the paper tucked in. I do it by tucking in the crutch first and then, once that section is safely tucked away, my hand is free to move further up the joint to help the other hand if needed (which is more relevant when making bigger joints to be honest).
If the paper just won’t tuck for you, then there are also a couple of tricks I can share that will make this much easier for you.

How to roll a joint hack
If you need help getting the paper tucked in before sealing it, then your credit card can help. Hold your joint in half and use the card to press the front of the paper in and down, so that it catches all of the flower and tucks it in. Pinch off the crutch end, slide your card out, and lick and stick baby.
How to roll a joint with a dollar bill
Another joint rolling hack involves using a dollar bill. Just make a fold at one end of the bill and fill it with your hemp or weed, then slide the non-sticky side of your rolling paper underneath the flower and then start rolling up the dollar bill. The stiffness of the dollar bill should help you roll and tuck it.
How to roll a cone joint
The secret to rolling a cone joint is in the distribution of the cannabis. You need to physically place a lot more flower in the cone end of the joint and then taper it down to the slimmer end to match the size of the crutch. Then just roll back and forth between your fingers, tuck, lick, and stick.
How to roll a joint without a filter
You can also roll a joint without a filter. The process is pretty much the same as above, but you just need to pinch and roll the mouth end as tight as you can and pull out any stray/loose flower, so it doesn’t get in your mouth.
Another way you can do this to create a straight joint is to evenly distribute the flower in the joint and pinch evenly at both ends when rolling. In my opinion, this style joint is much harder to master as it’s difficult to roll the ends of the joints firmly enough to stop the flower from falling out. So this one requires the most amount of practice.
How to roll a spliff
The way you roll a spliff instead of a joint is simply by adding a sprinkle of tobacco to your cannabis or CBD flower. In the UK and Europe, spliffs are far more popular than joints and, in fact, the words are used interchangeably because of this. If you’re visiting, you might want to ask if a joint has tobacco in it before accepting it, if tobacco is a problem for you.
How to roll a joint with gum wrapper
If you’re out of papers (and desperate) then a gum wrapper can come to your rescue by acting as a rolling paper. Just apply gentle heat with a lighter and peel away the silver layer of the paper before rolling up your joint with the other half of the paper. Just be careful to hold the joint carefully when you’re smoking it as, obviously, there’s no adhesive.
Why everyone should learn how to roll a joint
Back in the day, learning how to roll a joint was a rite of passage into your local cannabis smoking community. There was no such thing as a pre roll, unless you’d made it yourself, and you either learned fast or smoked everyone elses, which would only be tolerated for so long.
These days, however, pre rolls are readily available and they’re just as popular with the “can’t roll” customer as they are with an entirely new “can’t be bothered to roll” customer base.
I’m not saying that everyone needs to know how to roll a perfect joint, but I do think that everyone should learn how to roll a joint free hand for several reasons:
1. Quality control
When you roll your own joint, you’re in charge of the quality. You can source some premium quality hemp flower, so you know your joint contains nothing but 100% premium smokable flower.
Unfortunately there are some vendors around that will tell you you’re getting “100% hemp flower joints”, but what you actually end up with is poor quality hemp material. Sometimes it will be old and sometimes it will be trim, but either way it really ruins the smoking experience, as it will affect the way it tastes, how it hits your throat, and how it makes you feel.
Fresh, premium quality hemp can be a joy to smoke, but if you get an old or poor quality joint, it can taste pretty nasty and hit your throat very harshly too, making you cough. It’s a total turn off and a bad pre roll could put someone off smoking hemp forever if they didn’t know any better.
2. It’s way more affordable
This is a no brainer. Buying pre rolls costs more than buying bags of flower (and so it should). You pay more because there’s an extra step in production and there’s also usually more packaging involved, in order for the vendor to get them out to you safely and in good condition.
Think about how much you pay per pre-roll and then check out how much a bag of CBD flower costs from the same company. An eighth (3.5 gram) bag of flower could make you 7 x half gram pre rolls.
3. More enjoyable
I know this is just my personal opinion here, but knowing how to properly roll a joint is incredibly satisfying and with every single toke you can smugly think to yourself “I made this”.
Joints rule. You can still make yourself some pre rolls to take out with you for added convenience (here’s one I made earlier, no big deal), they’re great to share with friends (I may not bake, but I can roll joints), and they’re more discreet than using a pipe, bong or vape herb vaporizer in public.
You also can’t beat that feeling of coming home and finding half a joint in the ashtray that you’d forgotten about. Score 
How to roll a perfect joint every time
The only way to get to a point where you’re consistently rolling one perfect joint after another is by practicing a lot. You can make it easier on yourself by always using the same size papers, always using a grinder, making sure you’ve got a decent crutch to work with and (obviously) don’t tuck, lick, and stick until you know it’s perfect.
Sometimes I get frustrated if the joint isn’t coming together as smoothly as I hoped and rather than opt for perfection, I’ll usually aim for “smokable”. But if you take your time and make sure that you complete each step correctly, then you will end up with a perfect joint every time.
If rolling a joint by hand continues to prove too difficult, then why not buy yourself an automatic joint roller? The OG OTTO not only uses AI technology to mill your flower to perfection, but it also fills up a premade cone for you, so all you have to do is tamper/poke it down and then smoke it! It’s very easy to use and makes a great gift for those “can’t roll” smokers in your life.
How do you roll a joint? Do you have any tips or tricks you can add to the advice given here? If so, drop us a message in the comments below as We’d love to hear from you.
