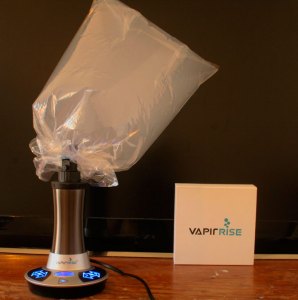
After having previously reviewed the Vapir Rise not that long ago, I decided to document how I clean my unit so that other Rise owners can benefit from the guide. As I’ve mentioned in the past, keeping your vaporizer clean is one of the best ways to maximize its efficiency, and improve vapor quality. Depending on how frequently you vape (as well as the stickiness of your bud) your Rise may require a full cleaning every two weeks to two months. Fortunately the Rise is quite easy to clean, and you’ll only need the following items (and twenty to thirty minutes of your time!) to get it working like new again:
-
CBD Vape, CBD Vape Kits, Innokin, Vape Kits, Vaping Products
Innokin Endura T18E 2 Kit
£19.58 (Incl. of VAT)Select optionsQuick View -
CBD Vape, Disposable Vape Pens, Disposables, Vaping Products
0mg SKE Crystal Bar 600 Disposable Vape Device 600 Puffs
£4.17 (Incl. of VAT)Select optionsQuick View -
CBD Products, CBD Vape, CBD Vape
LVWell CBD Iso-Vape 300mg 30ml E-liquid
£5.83 (Incl. of VAT)Select optionsQuick View
- Isopropyl (rubbing) alcohol
- Q-Tips
- A glass bowl or pyrex container (if you want to extract hash from the vape)
- Pipe cleaners (optional)
- Paper towel (or dry cloth)
Clean The Base Of The Unit
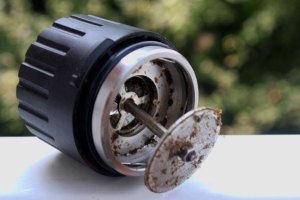
Firstly, remove all attachments and clean the base of the unit with a cloth moistened with water. Do not use rubbing alcohol on the stainless steel or the rest of the base, as it will likely discolor the finish. The heat trench where the herb chamber sits on top of should not require any cleaning so as long as you make sure not to spill any loose herb into it. If you do, simply unplug the unit and turn it upside down over a garbage (any loose herb should fall out easily).
Clean The Herb Chamber & Other Parts
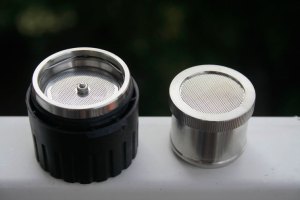
The first thing you’ll want to do is disassemble the herb chamber and place it in your bowl and then cover it with the rubbing alcohol. After letting it sit for 5-10 minutes in the solution, use some q-tips to gently clean off any built up residue on the herb chamber assembly and screen. Once you remove the residue, use a paper towel to remove any excess moisture from the chamber and then reassemble it. Next, you’ll want to soak the various connectors in the rubbing alcohol, and repeat the same process you did with the herb chamber (cleaning each one out with a q-tip then drying them off).
Clean The Whip (Or Bag) System

Since the Rise’s whip is made of silicone, you can soak it in a high-proof alcohol bath in order to remove the builtup residue (the same way you would with the other parts). I usually let my whips soak for about twenty minutes, stirring occasionally in order to loosen up any stuck hash. If you use the bag system to vaporize your herbs, make sure to replace your bag after you vape roughly six full bowls (I can get about 6-7 bag inflations per full bowl using high quality bud), as the bag becomes increasingly sticky over time (and you cannot clean it with rubbing alcohol). You can order replacements from Vapir or use turkey bags that can be purchased at most supermarkets.
Replace The HEPA Filter
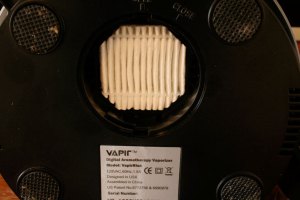
This is something that only needs to be done on a very rare basis, as my filter has continued to remain clean and it should for the foreseeable future. My parent’s home has a furnace HEPA filter (my mom has bad allergies and asthma) which runs 24/7 filtering an entire house, and that only needs to be replaced every six to eight months, so the Rise’s filter should last much longer with such little airflow. Its not completely essential to have the filter installed, but the Rise kit comes with a spare HEPA which you can change out when you feel the need.
The Vapir Rise is a great desktop vaporizer, and I’ve been using it regularly for over a month now (with the bag attachment) because of how easy to use it is. Keep your Rise clean and you should get lots of great tasting vapor!
The post Vapir Rise Cleaning & Maintenance Guide first appeared on CBD Village UK.

