

1. Shoot On a Movable Surface.
I have these four boards that I use as a background (the ones from my table that I got at the market in the Philippines that we took home in our suitcases with us ♥) and for a while, I was just setting them on top of the blue table. But then I’d want to move to get a new angle and I’d have to literally pick up every single board and rearrange each one with the angle I wanted, and repeat x100. Annoying and time consuming. The best solutions for efficiency with your setup angle are:
- a table with wheels (not even joking… that would be sweet. I’ve contemplated adding little wheels to my current table.)
- a table small enough to pick up and move
- a background board that is in one piece and can be easily moved
- some kind of large movable surface that can act as a base for loose boards, like what you see in the picture above
So my current set up is that I place my loose boards on flat sturdy surface. The one I’m using now is literally a white board flipped upside down. I can just drag, move, angle the large white board around the top of my big work table so that the loose boards go with me but stay in place. That feels more confusing than it should, but basically what I’m saying is try to give yourself the ability to easily move your entire set up. This enables you to get the best lighting angle possible with the least amount of hassle.
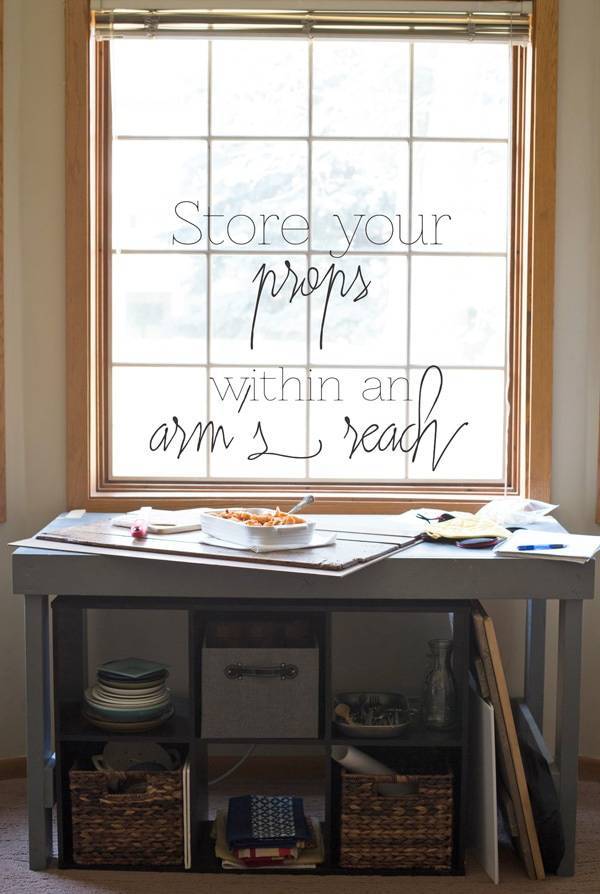
2. Store Your Props Within An Arm’s Reach.
Like, seriously, keep them right next to where you shoot if it’s even close to possible. I have a new food photography “studio” set up in our small apartmentlike house that involves these things:
- a scuffed-up and paint-stained blue table from Goodwill (LOVE that thing)
- a cube organizer with 3 cube boxes from Target
The table is my work surface that also doubles as a background, and the vertical empty space underneath is for all my reflectors and background surfaces.
The cube organizer is for my props and camera equipment. Special dishes go in the boxes, my camera and batteries gets the soft clothy cube, and the plates, textiles, and silverware are left on open shelves.
{Soap box side note: I love props, but can I just say this? Don’t overdo it with collecting food prop stuff unless you are the White on Rice couple. Or someone comparable. When your photography is your livelihood and you are just generally that cool, you’re allowed. But for most of us, we simply do not need 29231 styles of cake stands, tablecloths, and other prop gear. In the Philippines I had a total of about 10 dishes, I swear, TEN, to work with all year. It wasn’t ideal, but it worked. I firmly believe that props don’t make food photography – skills do. End rant.}
So everything I use for food photography fits in my studio, aka under this table, aka right within an arm’s reach when I am actually taking the photos. It’s the best thing I’ve ever done for myself in terms of streamlining my food photography process. I just reach down, grab a cloth, and swap it for a new one if I don’t like it. No more walking over to the closet or running back into the kitchen to get a new dish or a different piece of silverware. Because of the way I’ve arranged and organized my equipment, it takes me ONE SECOND to make a quick prop change during a shoot. That makes a girl happy.
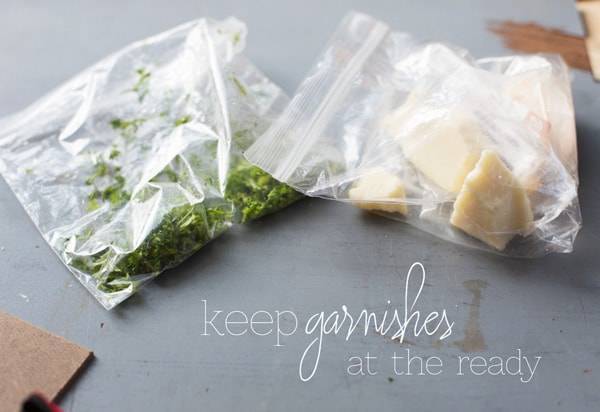
3. Keep Garnishes At The Ready.
When I was writing and doing the food photography for the Creamy Cauliflower Sauce eCookbook, pre-chopped, pre-washed, pre-grated, pre-shaved, pre-crumbled garnishes saved my life. I repeat: Saved. My. Life. For some reason, there is nothing more annoying than getting to the end of your recipe and prepping your shot and then having to leave my thrift store table studio and run back into the kitchen to mince some parsley for a pop of color or texture in the shot. And then it sticks to your fingers cause it’s all wet, and then you have an extra dish to wash, and… meh.
I am a big time supporter of efficiency and simplicity, so preparing myself things like bags of minced parsley that can be grabbed out of the fridge and used IMMEDIATELY makes me feel like I’m winning at life. I don’t mean a bunch of parsley sitting in your cripser drawer or a brand new block of cheese still in the wrapper. I mean you took 10 minutes at the end of last week to prepare your garnishes for this week’s photos by chopping, washing, grating, and bagging everything up in ready-to-use form. When I do this, the herbs often last me for a week or more and the cheese, especially if it’s good old cheese, lasts, like, forever. This make-ahead tip is also great for crumbled bacon, toasted nuts, zested lemons, or other all-purpose garnishes require a lil’ bit of prep. Sadly this little tip is not ideal for more delicate things like basil ribbons. Those lil guys turn brown so quickly. But you get the idea.
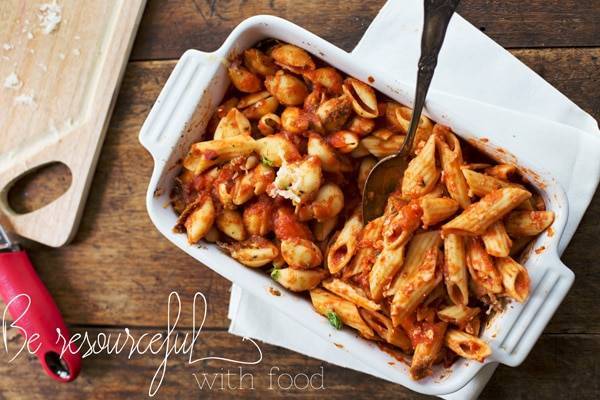
4. Be Resourceful with Food.
Raise your hand if you enjoy wasting time and money and food. You either? I hate it. Enter food blogger dilemma – for this photo shoot, I did not have any boxes penne pasta left. I had tried the recipe with the penne pasta, I knew I wanted to shoot the dish with the penne pasta, but I didn’t have any and the grocery store suddenly felt so far away. If you are a food blogger, you know this moment and you know it well. You also know that those little trips to the grocery store to buy those three random last ingredients really add up in time and money.
So in this true story, I contemplated going to the store but then I remembered something: I actually did have some penne pasta. Because in the fridge there was a leftover container of a different penne pasta that I had made for something else. So I rinsed the sauce off of this leftover penne pasta and then I used it for my photo shoot. But wait – I’m weirder. I didn’t have enough penne pasta to cover the bottom of the pan so I found another container of a leftover pasta shells and did the same thing. I put the penne on the front half so that that’s what would show in the picture and hid the shells in the back.
Scrappy, frugal, resourceful, call it whatever. It saved me a trip to the grocery store, it put some leftovers to good use, and I didn’t end up buying yet another box of penne pasta. I do stuff like this all the time to make my photos work. Um, no, almost never for my recipe testing and development. But I definitely do this for my photos. There’s no magic list or anything for this one; I’m just really encouraging you to avoid defaulting to that one last grocery store trip. Do you have something in your house already that could work for this photo? Be resourceful. Save time and money. Use what you already have to get the food to look the way you need it to.
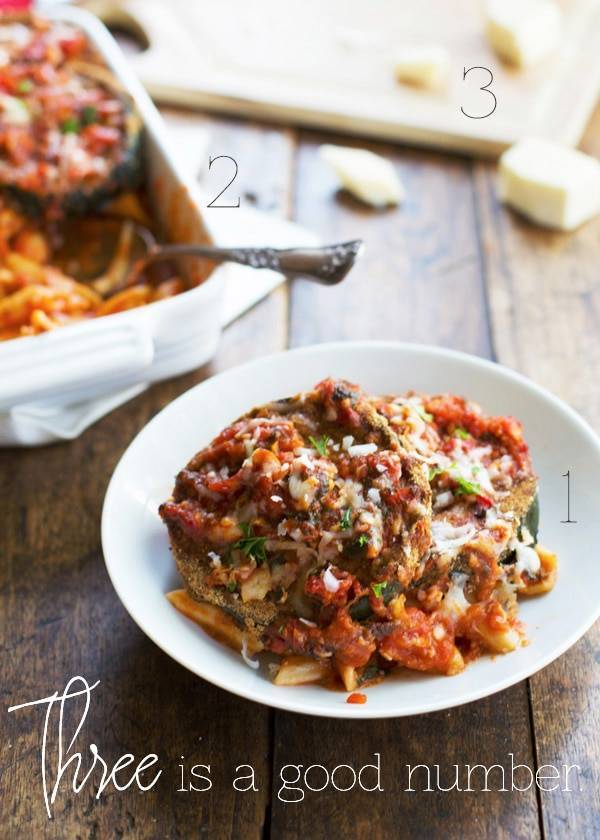
5. Three Is a Good Number.
I am really impatient with my food photography, cause mostly I’d rather be eating. I like to put the food smack down on the table and shoot, one and done. Honestly, sometimes planning the composition of a shot feels like it just requires too much thought at the end of a long day. But adding the right number of props in the right number of places can really help tell a more interesting story through your food photography which is going to be a lot more engaging to your viewers or readers.
Again and again and again, I find that three is a great number to work with when choosing and arranging props. It’s a no-brainer time saver to just keep that idea of three in the back of your mind – it makes the process of composing a shot almost effortless. If I find myself struggling to think of how to start composing a shot, I default to three. In this picture, there are three focal points in the photo: the plate (which is the main focal point), the full baking dish with the spoon (secondary focal point), and the cutting board (third focal point). Plus, I can’t believe it worked out this way, but look at the cheese. I had one-two-three little chunks broken off that I arranged near the cutting board. Ok, maybe four because of that one tiny piece. But I’m tellin ya. Things in threes just work.
That’s all I’ve got for ya today, foodie photag friends! I’m off to a strange new world called work. Except how can you really call teaching kids how to read in small groups at the world’s sweetest elementary school “work?” I honestly don’t know how I got so lucky. I am so looking forward to this day.
In other news, we’re going house shopping after work and I can’t wait to tell you what we find! I have my hopes way up, because, well, that’s what I do. #mistake #ohwell
XOXO
If you’re interested in learning more simple tips and tricks for taking better food photos, check out Tasty Food Photography, my ebook!


I just released an updated version that has more than 15 additional pages on lighting, smartphone photography, and creating emotions through food photography.
The post Behind the Scenes: 5 Time-Saving Tips for Food Photography appeared first on Pinch of Yum.